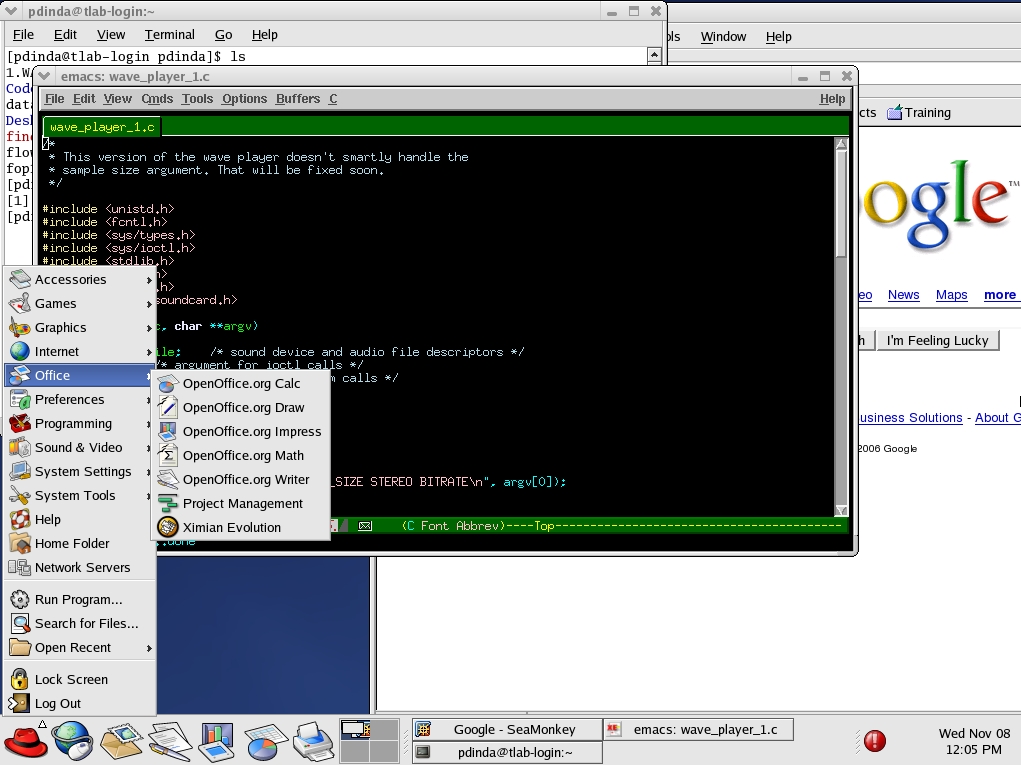
when you use it sitting in front of the machine, but looks like this:

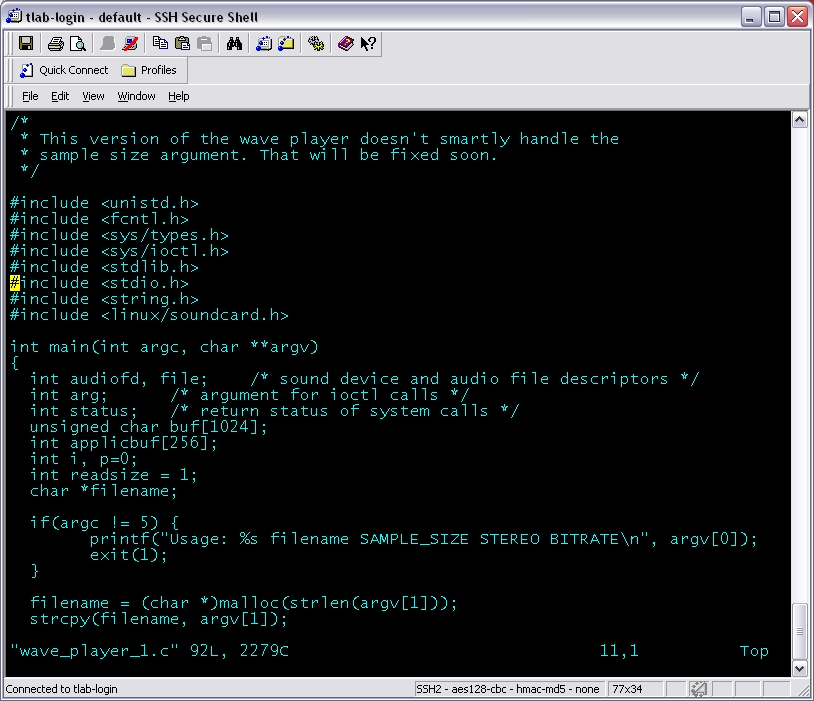
when you log in remotely.
If you're new to using Unix (Linux, Solaris, BSD, whatever), you
may have wondered why it looks like this:

when you use it sitting in front of the machine, but looks like
this:

when you log in remotely.
This page will show you two ways to make your remote use of a Unix system as pleasantly graphical as using it locally.
I'll describe things using the TLAB, but the same techniques will work on almost every Unix platform, including the Wilkinson Solaris machines and Unix VMs running in the VLAB
We will consider VNC, then X11. You probably want to use VNC since the software you need to install on your client computer is very minimal, the experience is identical to using the Unix machine from the console, and your session persists even in the face of client or network failure.
If you'd like to use Microsoft Windows XP remotely, you can use its built-in Windows Remote Desktop feature, which is very similar in functionality to VNC.
VNC is a free tool that consists of a client and server, both of which are very small programs and are available for Windows and many flavours of Unix. You need only download the VNC client to use the TLAB, Wilksinson Lab, and VLAB machines remotely, as they already have the server installed.
What the VNC server does is create an X11 Session, very similar to what happens when you log into the console of the computer, except that the X11 Session data exists in main memory instead of in the video card. VNC provides remote access to this "frame buffer" memory and sends your remote mouse movements and keystrokes to the X11 server. Multiple VNC sessions can exist on the computer at once; many remote users can have a "desktop" experience on the same machine.
To start up a VNC session on the TLAB machines, you would ssh into
the machine and then execute this:
[pdinda@tlab-login pdinda]$ vncserver -geometry 1024x768 -depth 24

You will require a password to access your desktops.

Password:
Verify:

New 'tlab-login:1 (pdinda)' desktop is tlab-login:1

Starting applications specified in /home/pdinda/.vnc/xstartup
Log file is /home/pdinda/.vnc/tlab-login:1.log

[pdinda@tlab-login pdinda]$
The vncserver command is requesting a 1024x768 screen with 24 bits per
pixel. The first time you run vncserver, it will ask you to choose a
password for your screen. Choose wisely! You probably don't want
anyone else to be able to use it! You can change your password later
using the vncpasswd command. An important thing to note in the output
of the command is the name of the session. In this case, it is
tlab-login:1.
You can now connect to your session. Run your VNC client. It will
give you a dialog box something like this:

Give the name of your session (tlab-login:1 in this example), and then
it will ask for your password:

This is the same password you provided before.
If you've never configured VNC on the Unix machine, you'll see
something like this:

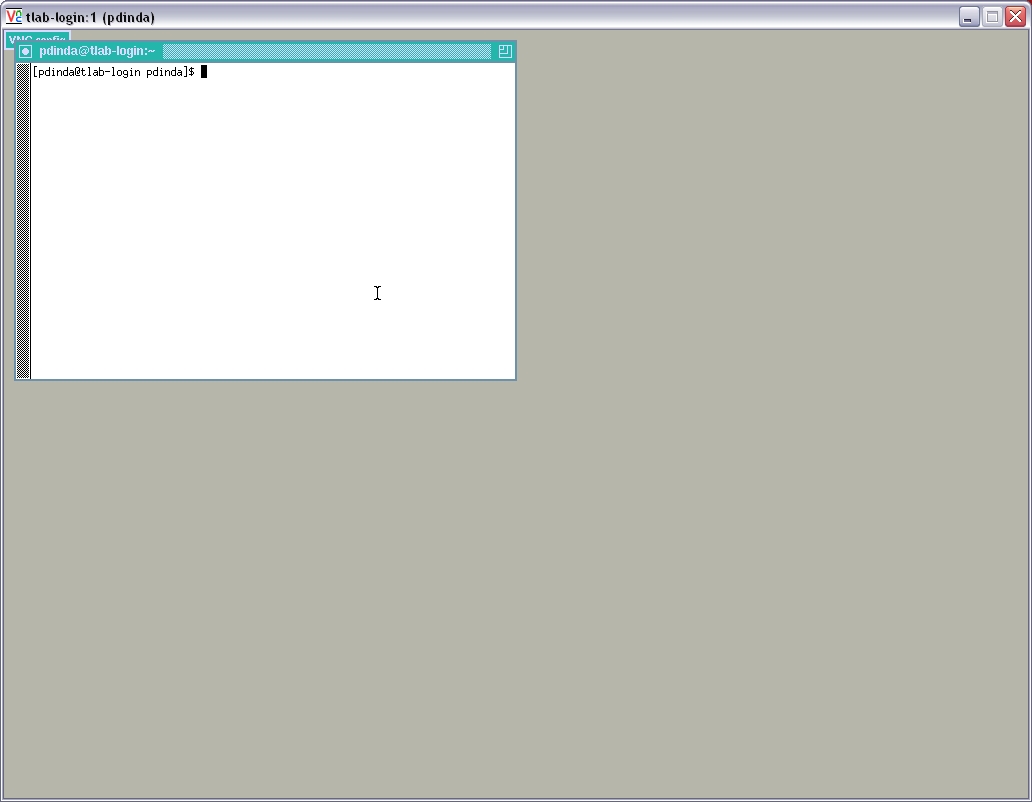
This is pretty ugly looking. Here's why. In X11, unlike Windows or
the Mac, you can choose which window manager will be used. VNC,
by default, chooses "twm", the "Tiny Window Manager", which is,
well, tiny. But we can change it to use Gnome (the default
manager in Linux) or KDE, or whatever we want.
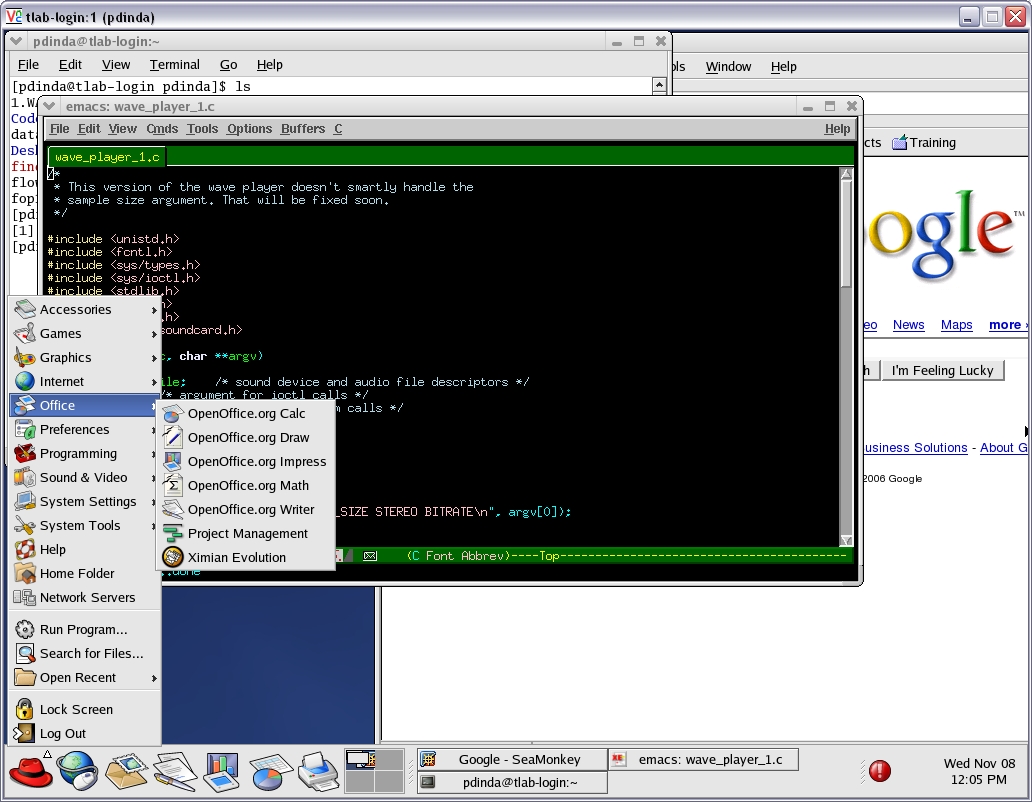
Let's reconfigure VNC so we get a gnome-session, making it identical to the experience of using the TLAB computers from the console.
First, we'll stop our VNC session:
[pdinda@tlab-login pdinda]$ vncserver -kill :1
Killing Xvnc process ID 16644
Next, we'll change our startup to use gnome. We'll go into the VNC directory:
[pdinda@tlab-login pdinda]$ cd ~/.vnc
[pdinda@tlab-login .vnc]$
#!/bin/sh

# Uncomment the following two lines for normal desktop:
# unset SESSION_MANAGER
# exec /etc/X11/xinit/xinitrc

[ -r $HOME/.Xresources ] && xrdb $HOME/.Xresources
xsetroot -solid grey
vncconfig -iconic &
xterm -geometry 80x24+10+10 -ls -title "$VNCDESKTOP Desktop" &
twm &
#!/bin/sh

# Uncomment the following two lines for normal desktop:
# unset SESSION_MANAGER
# exec /etc/X11/xinit/xinitrc

[ -r $HOME/.Xresources ] && xrdb $HOME/.Xresources

gnome-session &
[pdinda@tlab-login .vnc]$ vncserver -geometry 1024x768 -depth 24

New 'tlab-login:1 (pdinda)' desktop is tlab-login:1

Starting applications specified in /home/pdinda/.vnc/xstartup
Log file is /home/pdinda/.vnc/tlab-login:1.log

[pdinda@tlab-login .vnc]$

The following are important facts and features of using a Unix computer remotely through VNC:
Some computing environments (though not the TLAB) have firewalls that prevent traffic to/from the VNC ports (5901 and up). This is because some people perceive VNC as a security risk because the user determines his own password policy and much of the communication it does is unencrypted.
Even if you are in such a restricted environment, you can still use VNC by tunneling it through SSH. Here is how to do this.
Most users can stop reading right now since VNC is probably what they want. However, you can also use X11 directly. X11 was designed specifically to make it possible to run graphical applications remotely. One advantage of using X11 instead of VNC is that you can arrange that all of your remote windows share the same desktop with your local windows. In VNC, all of your remote windows are confined to your VNC window. Another advantage is that performance might be better, especially on slow networks. The main disadvantage is that there is no notion of persistence: you can't switch clients without shutting down your programs and any temporary network failure will cause your programs to stop. Another disadvantage of X11 is that the software is much larger and more complex than VNC.
If you're using a Linux machine as your client, you already have X11. If you're using a Mac, X11 is available for free from Apple. If you're using a Windows box, you can either use the campus site license for XWin32 or the free X11 that is included in Cygwin.
Many guides on using X11 make things more complicated than they need to be and suggest mechanisms that don't work well in a world of firewalls. If your client is not firewalled, it should be, and a firewalled client prevents the age-old "setenv DISPLAY client:0" or "export DISPLAY=client:0" model from working at all. The trick to using X11 easily is to use SSH tunneling. SSH tunneling not only provides a secure, encrypted connection for your X11 traffic, but it also manages the process of selecting a DISPLAY setting.
To use X11 remotely, do the following:
If using X11 forwarding via SSH as described above does not work, and local X11 programs do run correctly, chances are very good that the SSH server configuration on the machine you're logging into is severely broken and needs to be fixed.